 "SantaRita" (SantaRita)
07/27/2017 at 10:01 • Filed to: projectcarhell, wrenching, truecost, restoration, practical enthusiast, syndication, rotary, rx7, rx-7, interior, builds, notatruckorjeeporbritish, whatittakes
 5
5
 8
8|
"SantaRita" (SantaRita)
07/27/2017 at 10:01 • Filed to: projectcarhell, wrenching, truecost, restoration, practical enthusiast, syndication, rotary, rx7, rx-7, interior, builds, notatruckorjeeporbritish, whatittakes | 5
| 8 |
Have you had a tetanus shot recently?
Nevermind.
You’ll be fine.
Probably.
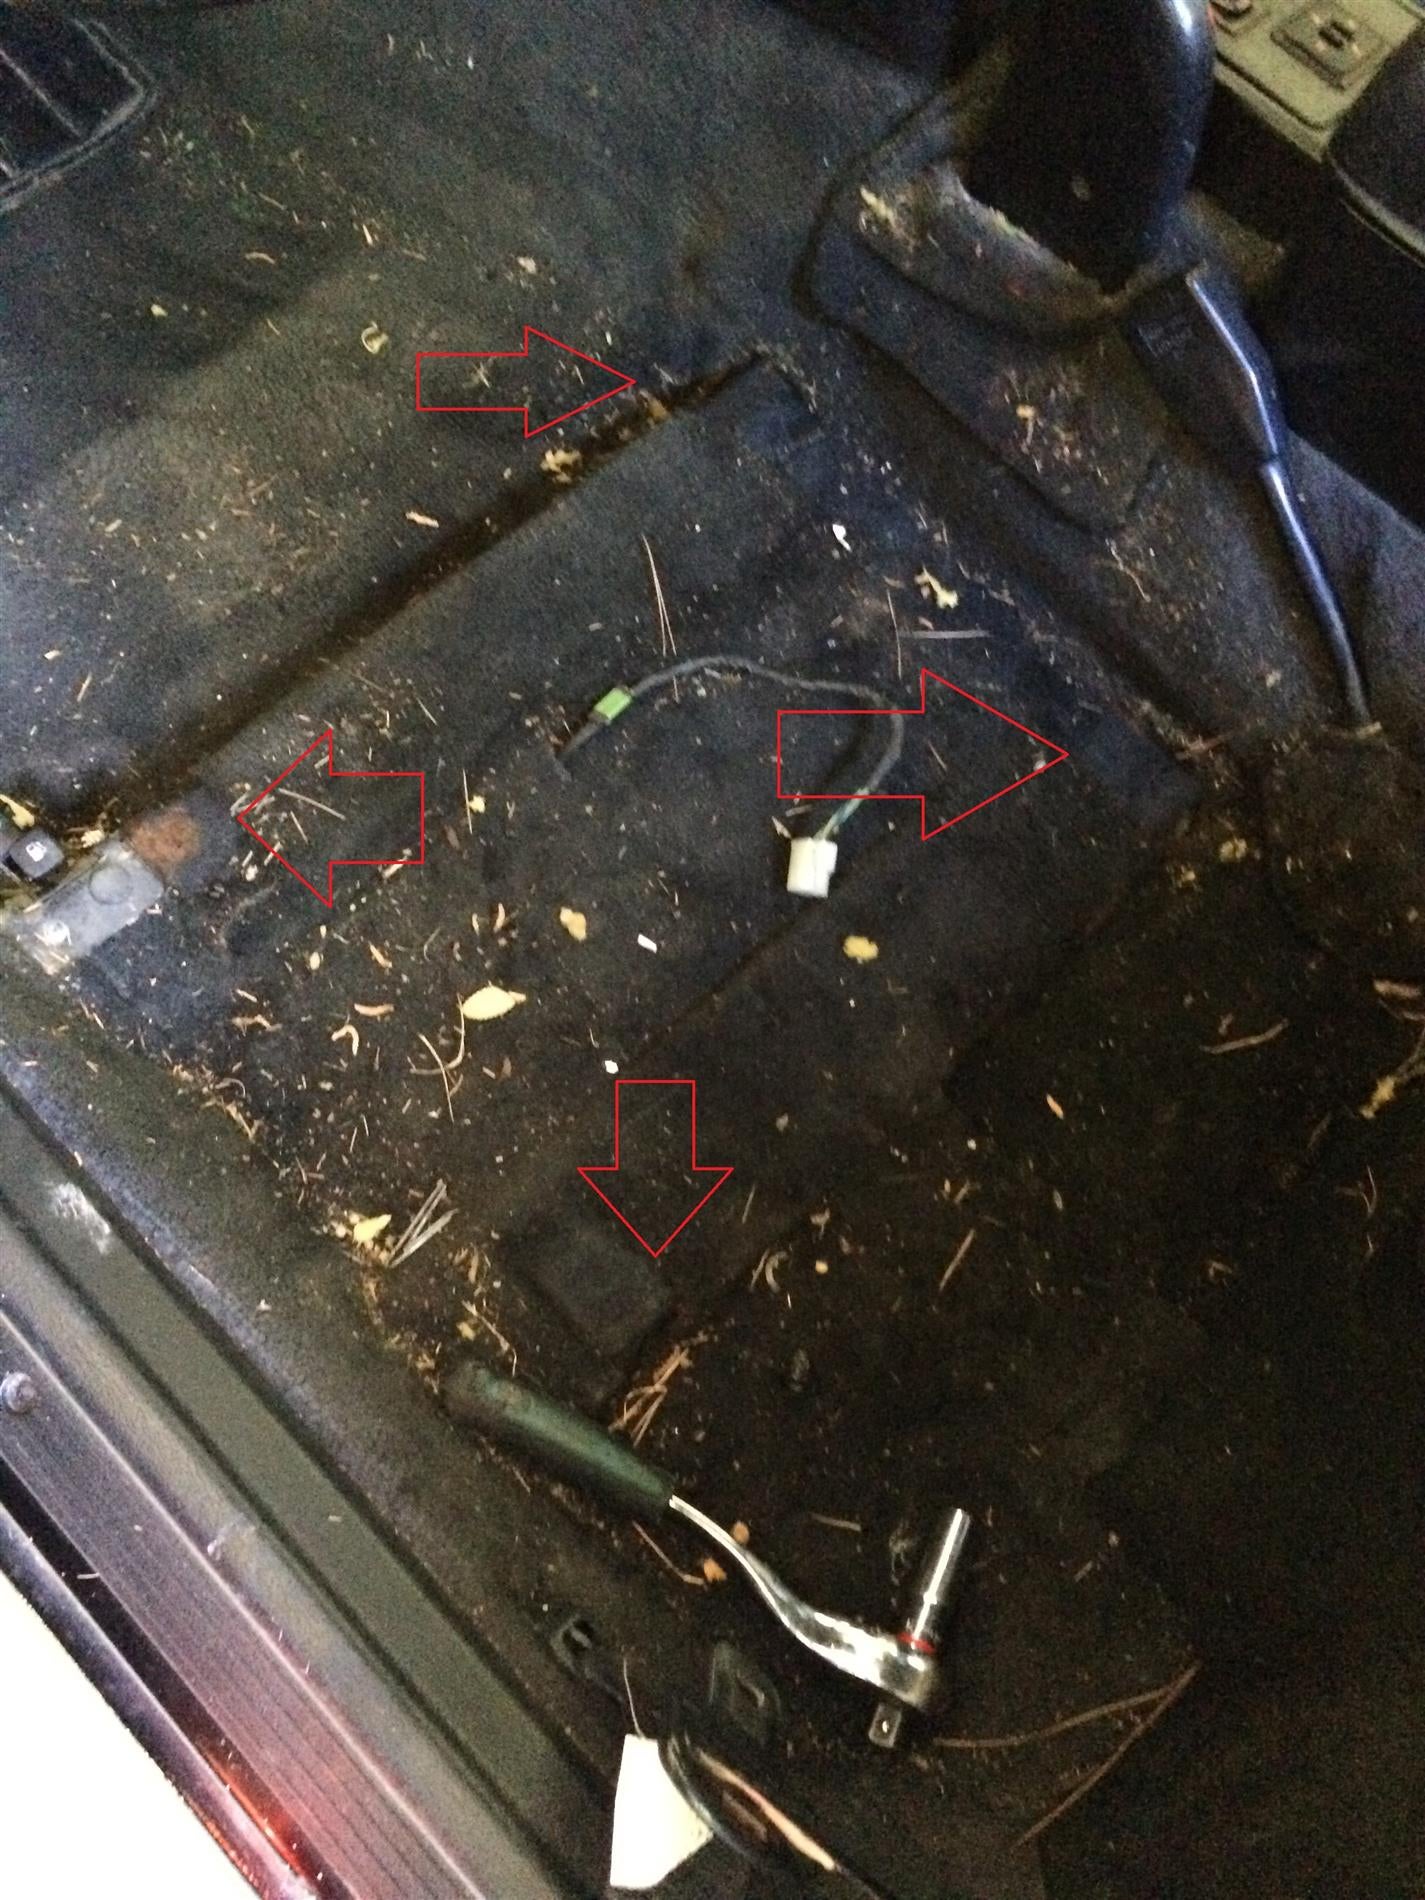
seat cavity. i made 52 cents. now is a good time to vacuum it out.
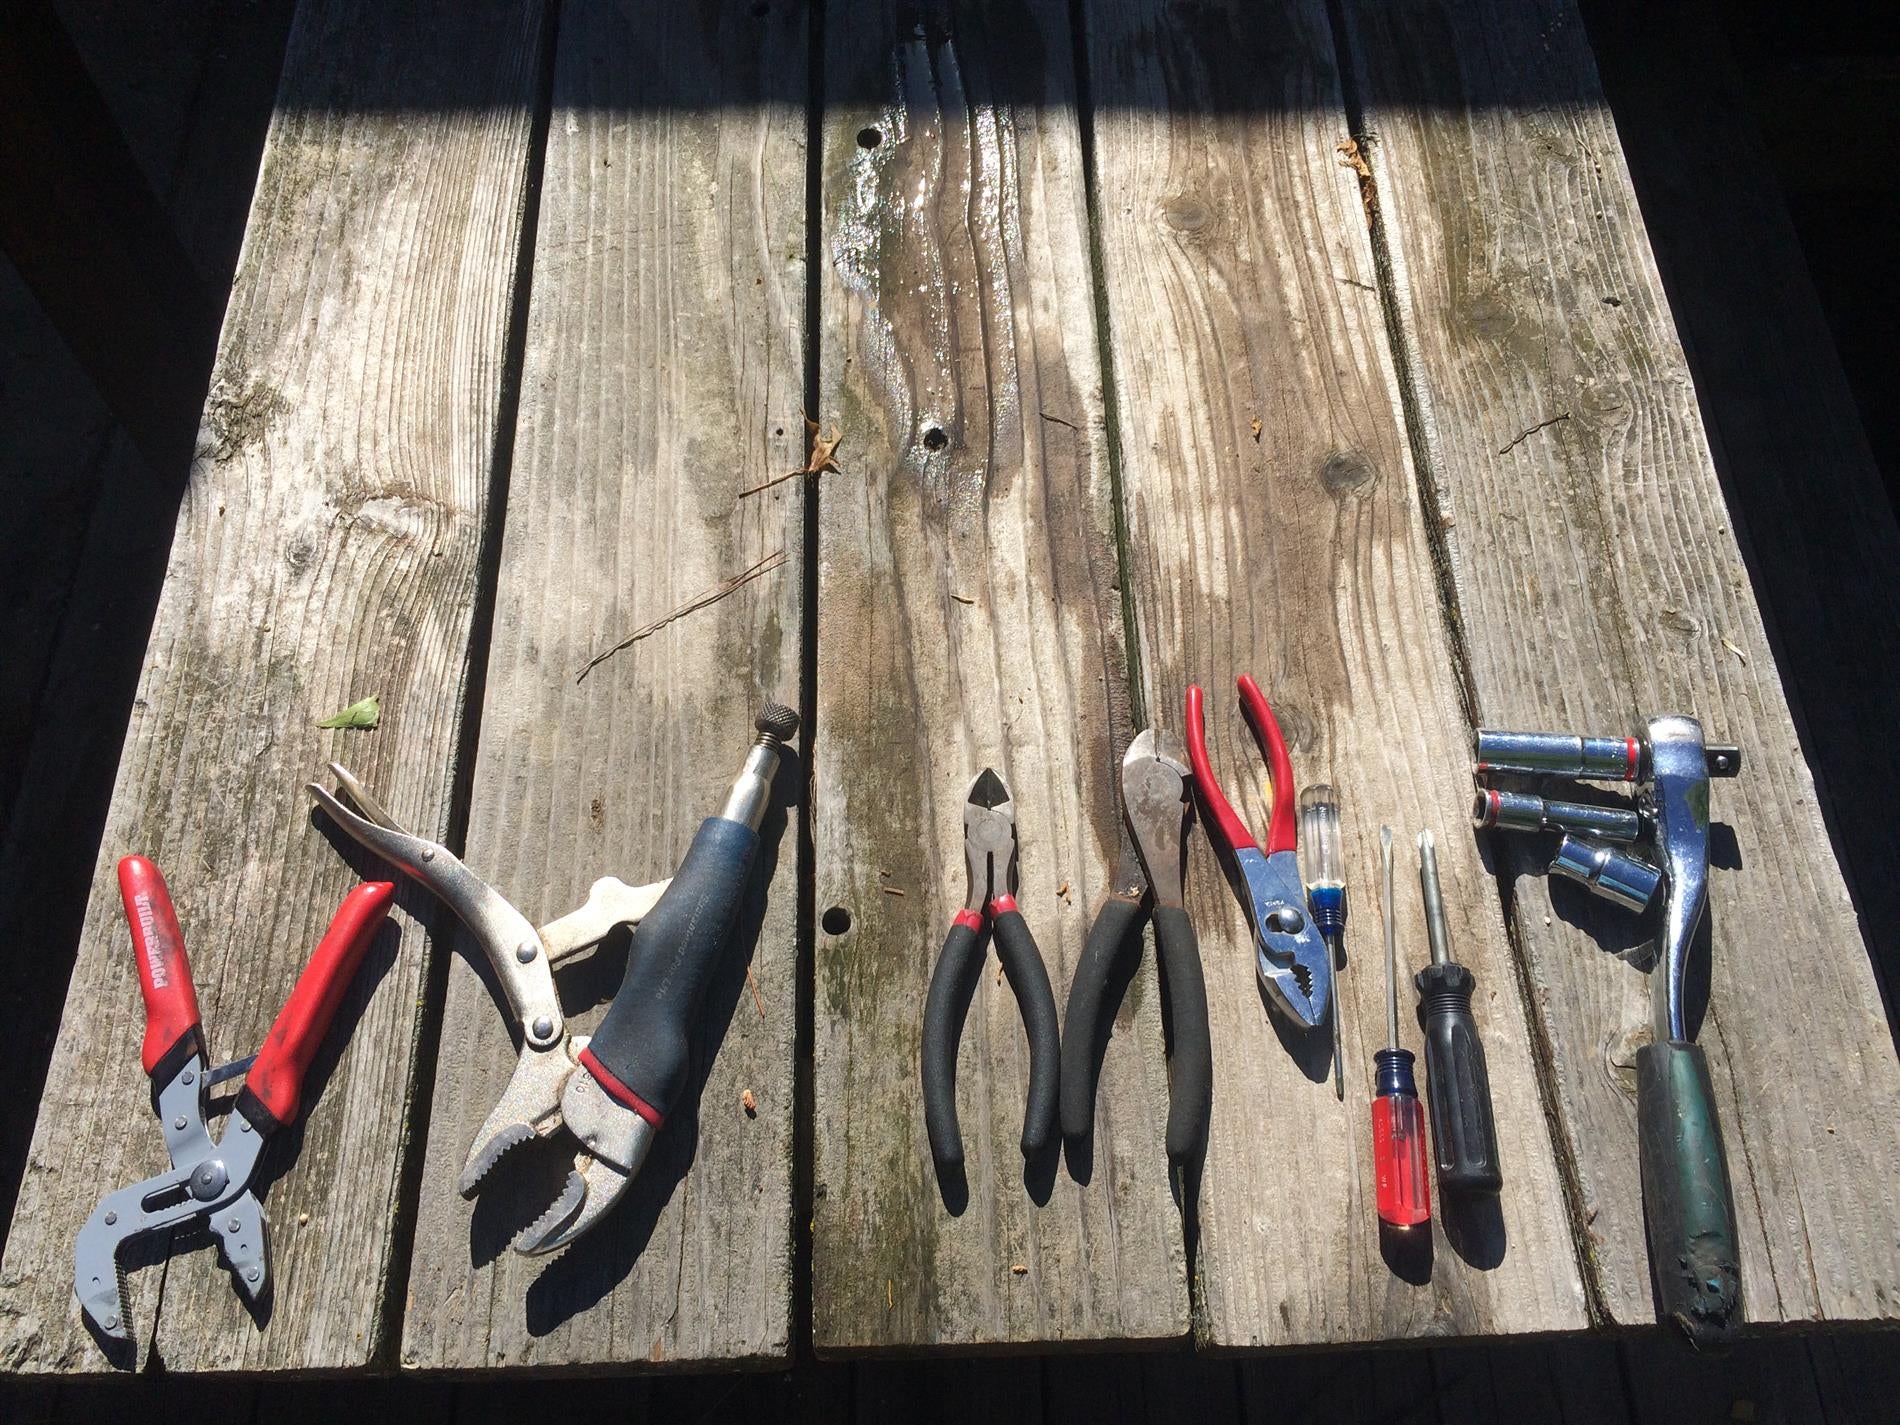
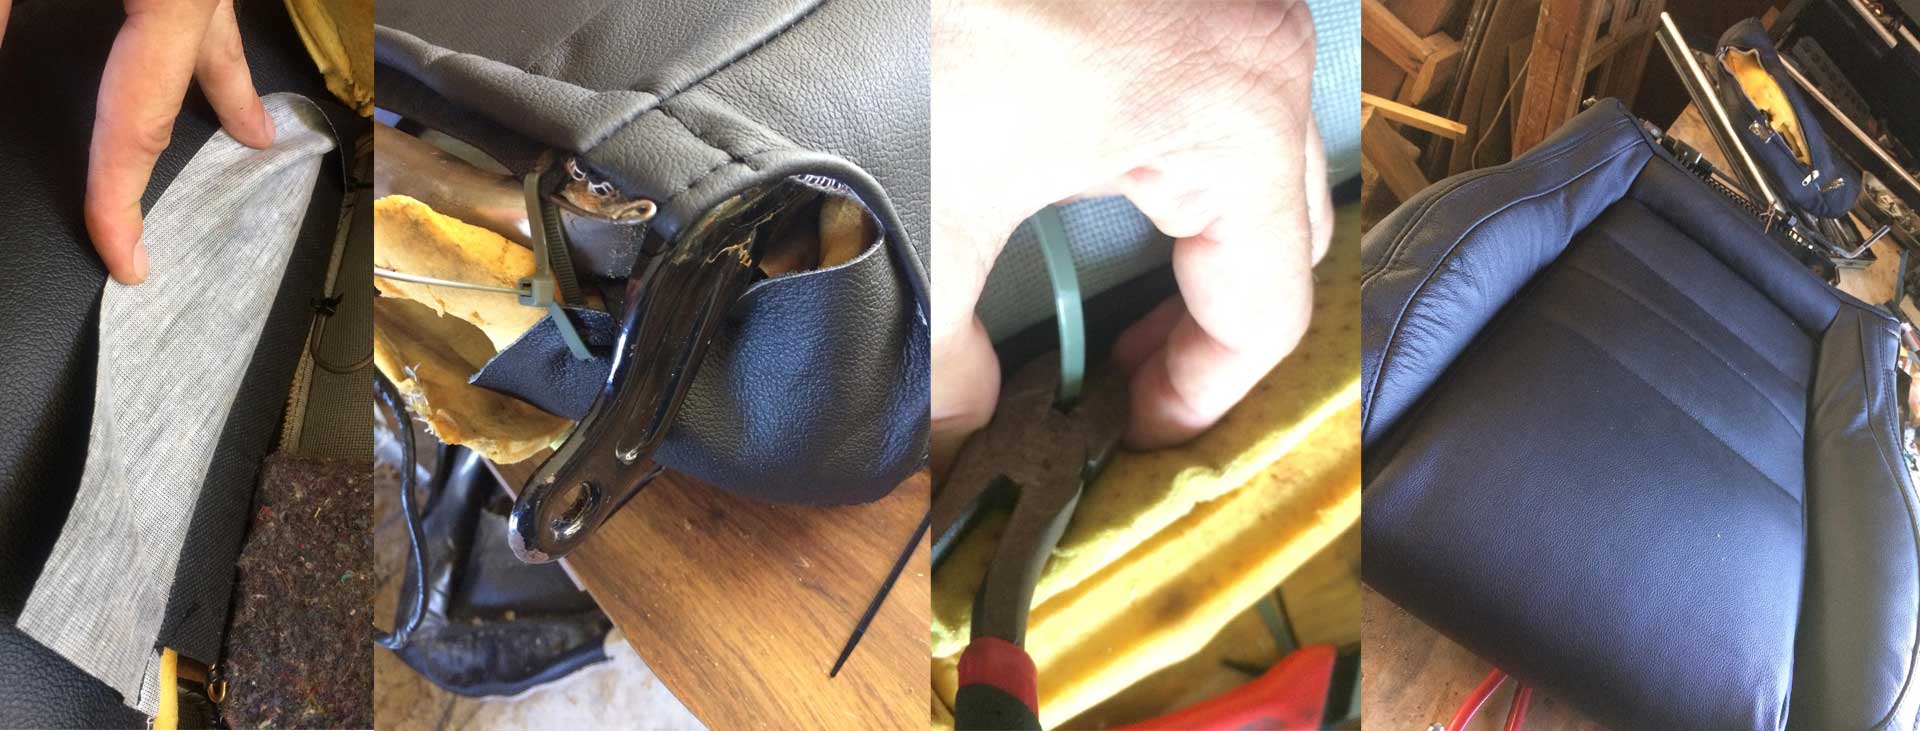
You will need !!!error: Indecipherable SUB-paragraph formatting!!! , and some amateur tools though. I used these for poking, pulling, and clipping. They also came in handy when snipping several packets of heavy duty zip ties. I did say amateur as zip ties are the lay man’s hog-rings. Zip ties are more forgiving (to me) and have been used for years by !!!error: Indecipherable SUB-paragraph formatting!!! , !!!error: Indecipherable SUB-paragraph formatting!!! . Internet Amateur tip: Make sure you buy Heavy Duty(75lbs), UV resistant, Zip ties or left in the sun it may come back undone.
The first step in this feat was to remove the seats. In my car it was bolted to the floor w/ 14mm bolts (4). There was a wire to unclip (in my case headrest speakers are equipped). If you have powered or fancy seats you will have more clips to defeat.
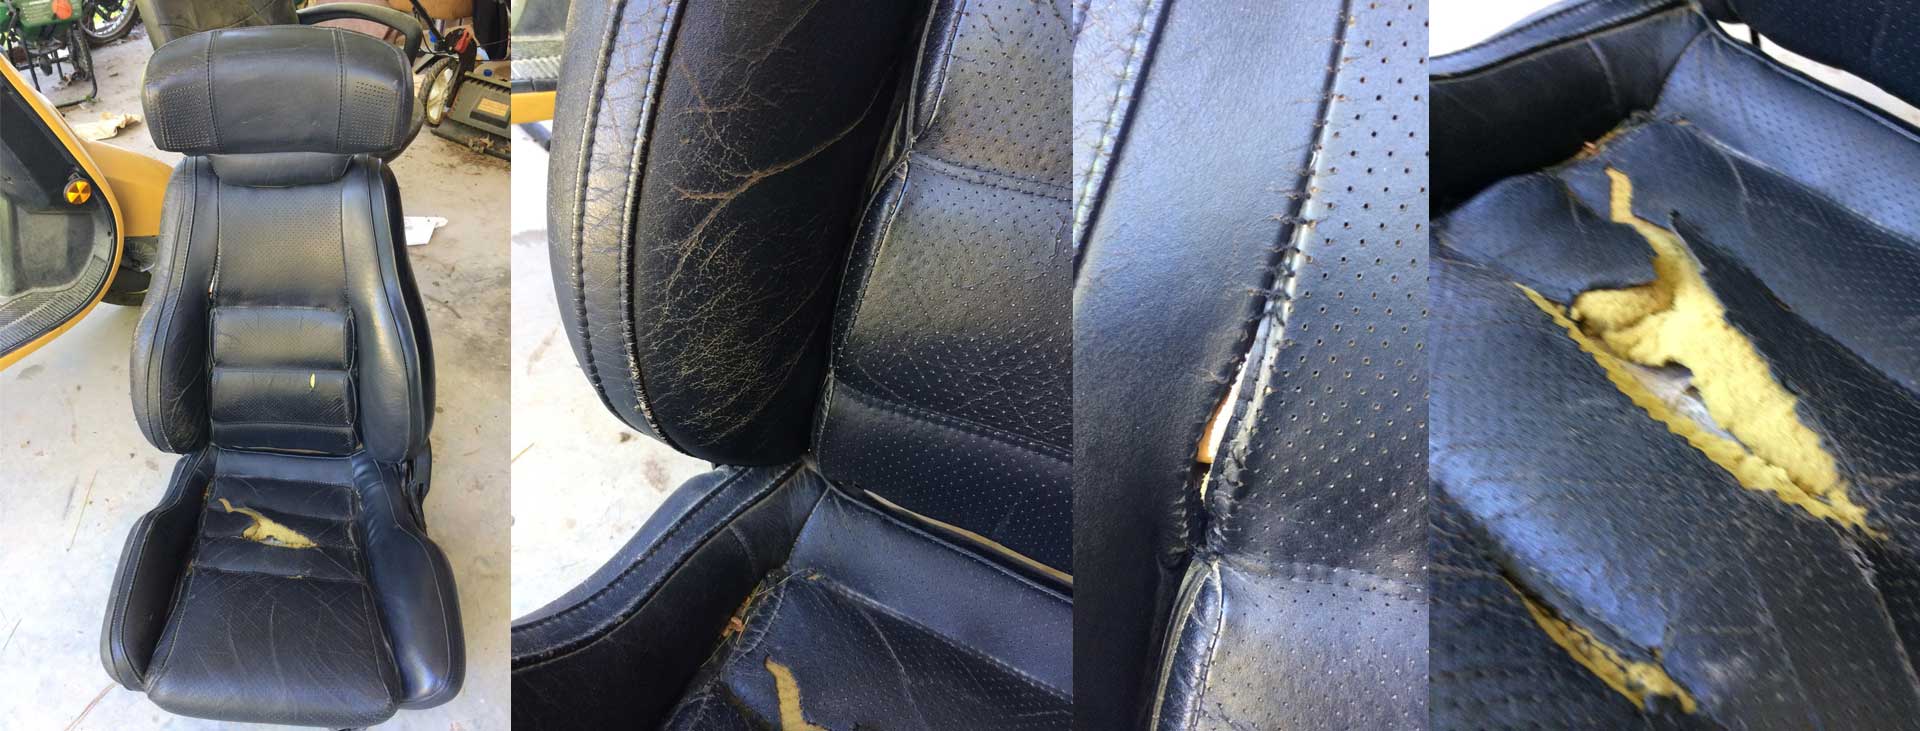
leather is cracked leathery and tough a john wayne
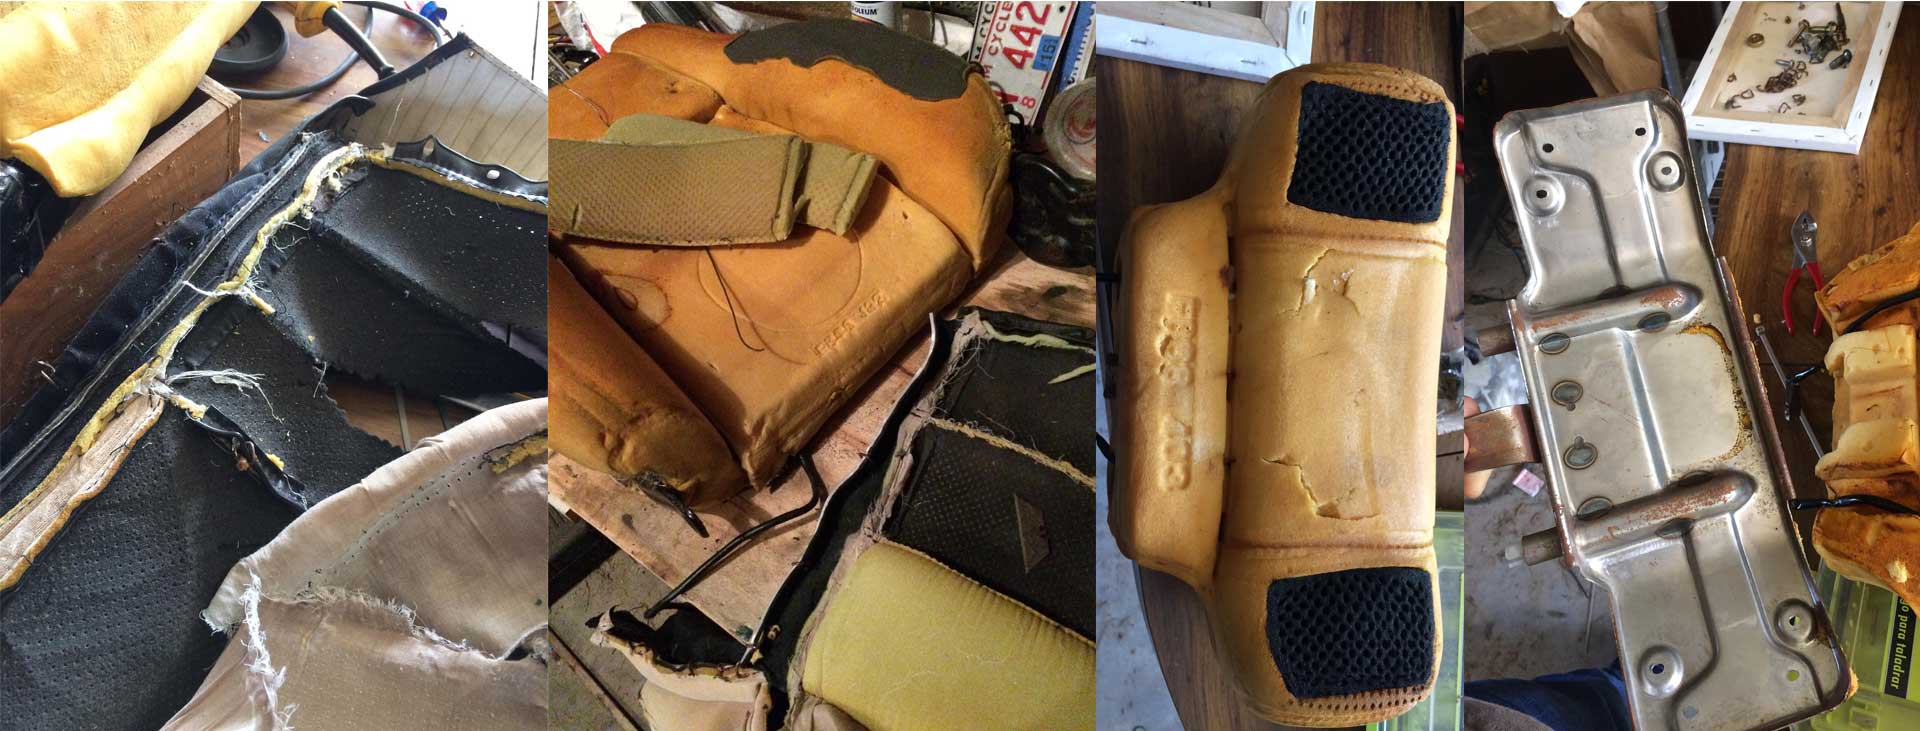
The leather is hard, cracked and torn. parts of the seat foam are worn. Stitching is forlorn. The next step entails removing seat rails and unscrewing all plastic covers you’ve discovered.
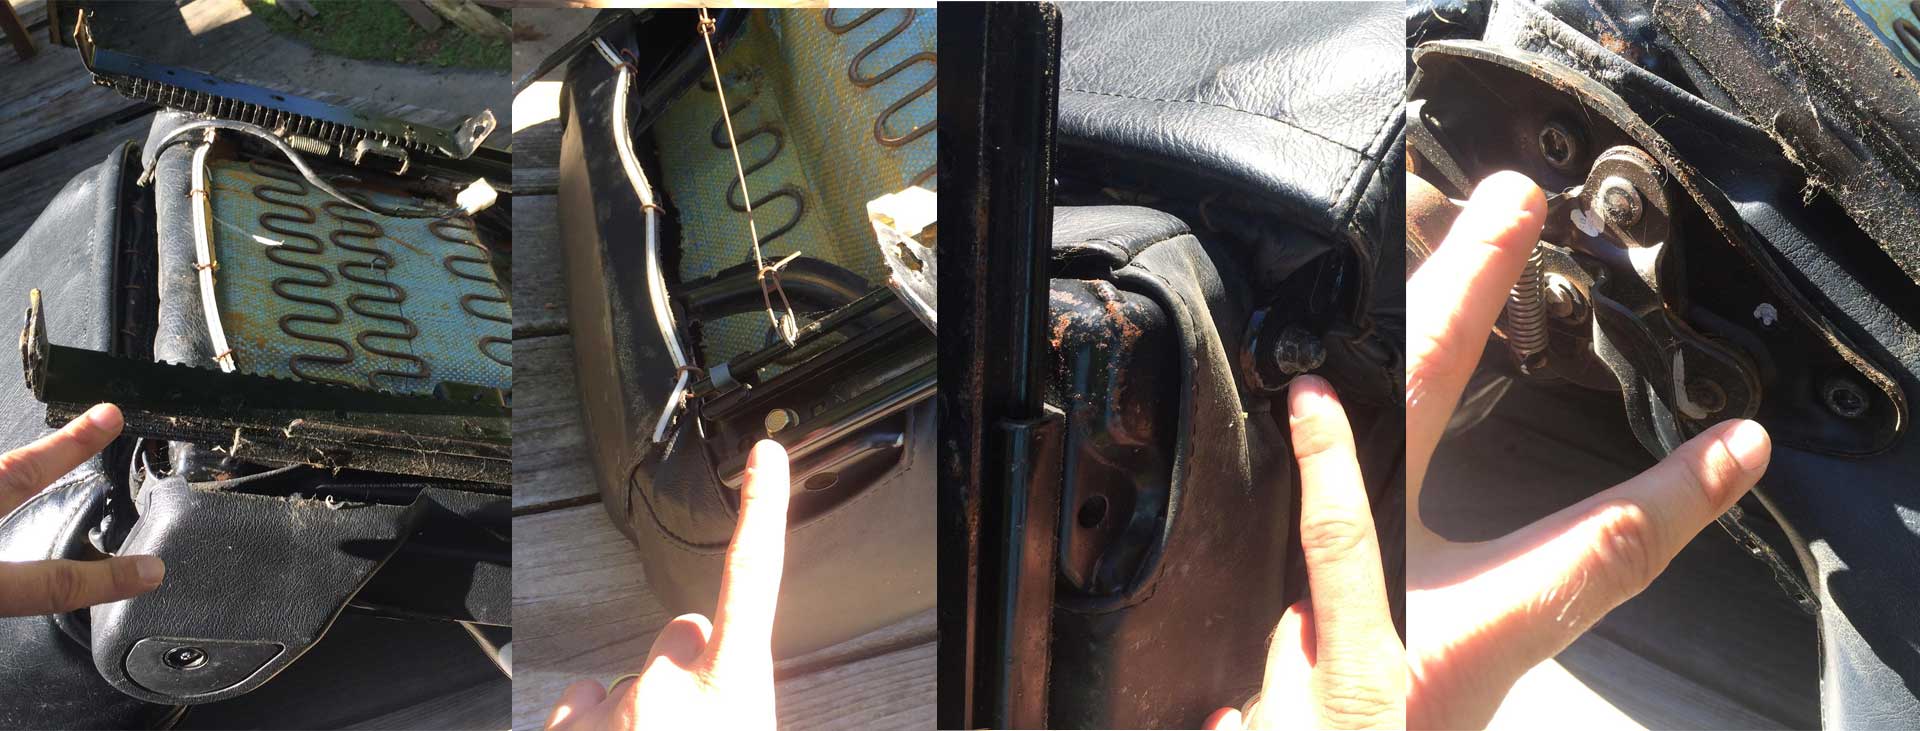
GET STARTED BY TAKING OFF THE SEAT RAILS AND ANY PLASTIC COVERS
Then you pull every hog ring with pliers, or a clip of the snips. Most will be rusted & sharp so keep a safe grip if want to avoid that tetanus trip.
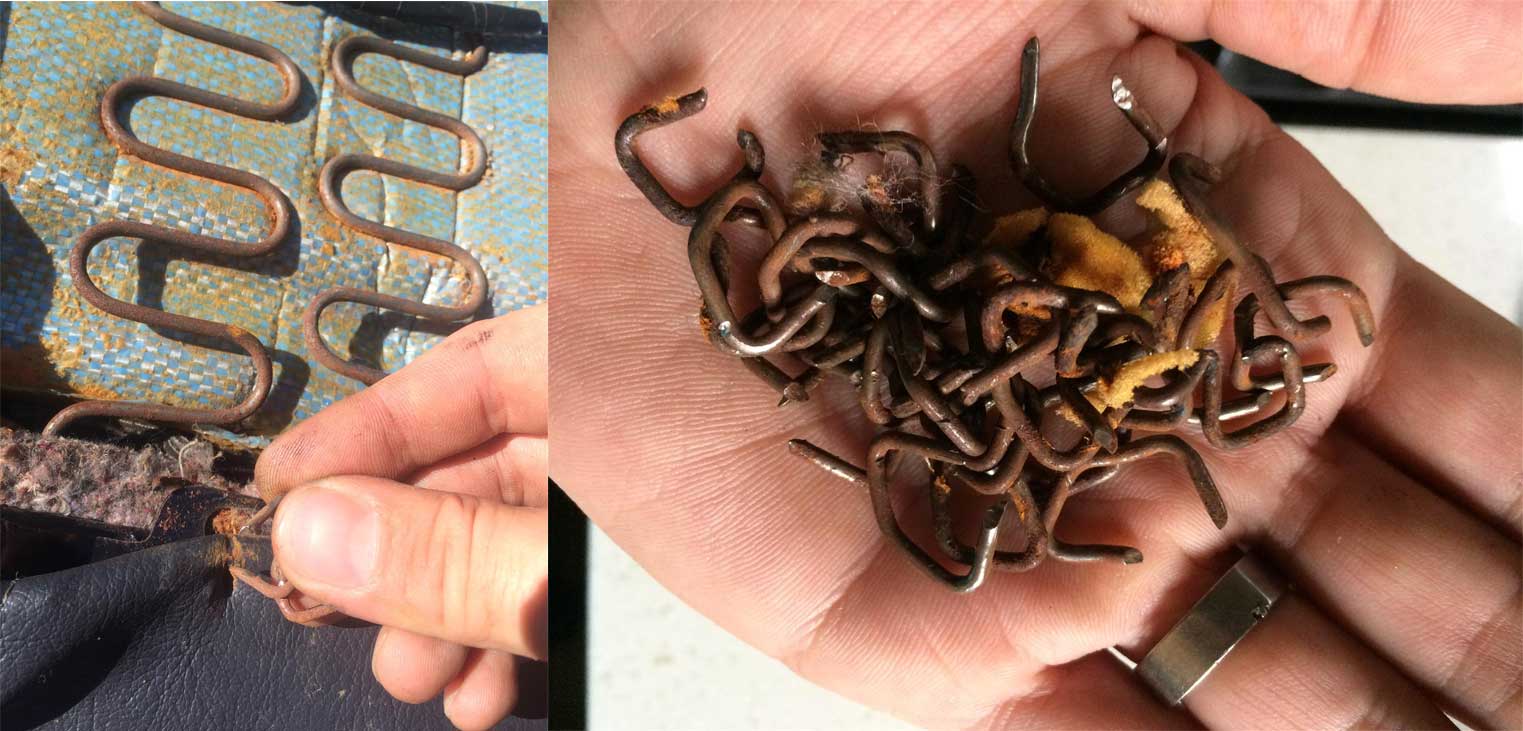
Once all rings are released you’ll have skinned the beasts and be left with somewhat musty heaps. Don’t be gentle, removal takes heart.
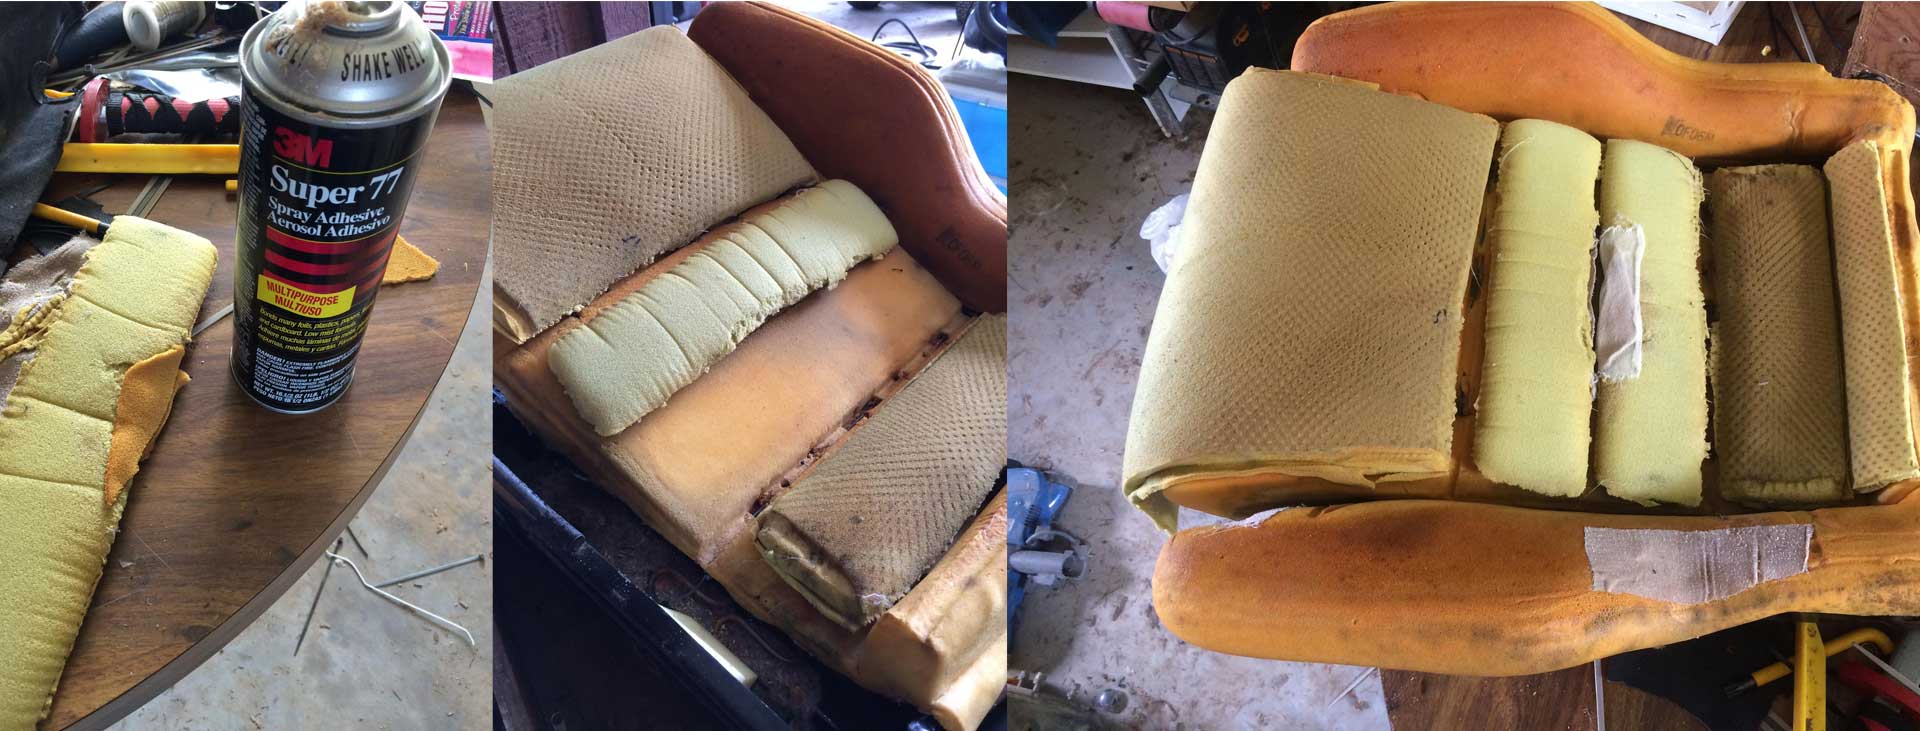
I took extra care to repair the cushion where it was mushed in. I split the seams and spelunked for foam chunks trapped inside the old covers. Then sprayed them with a contact adhesive to re-piece them back to seat shaped.
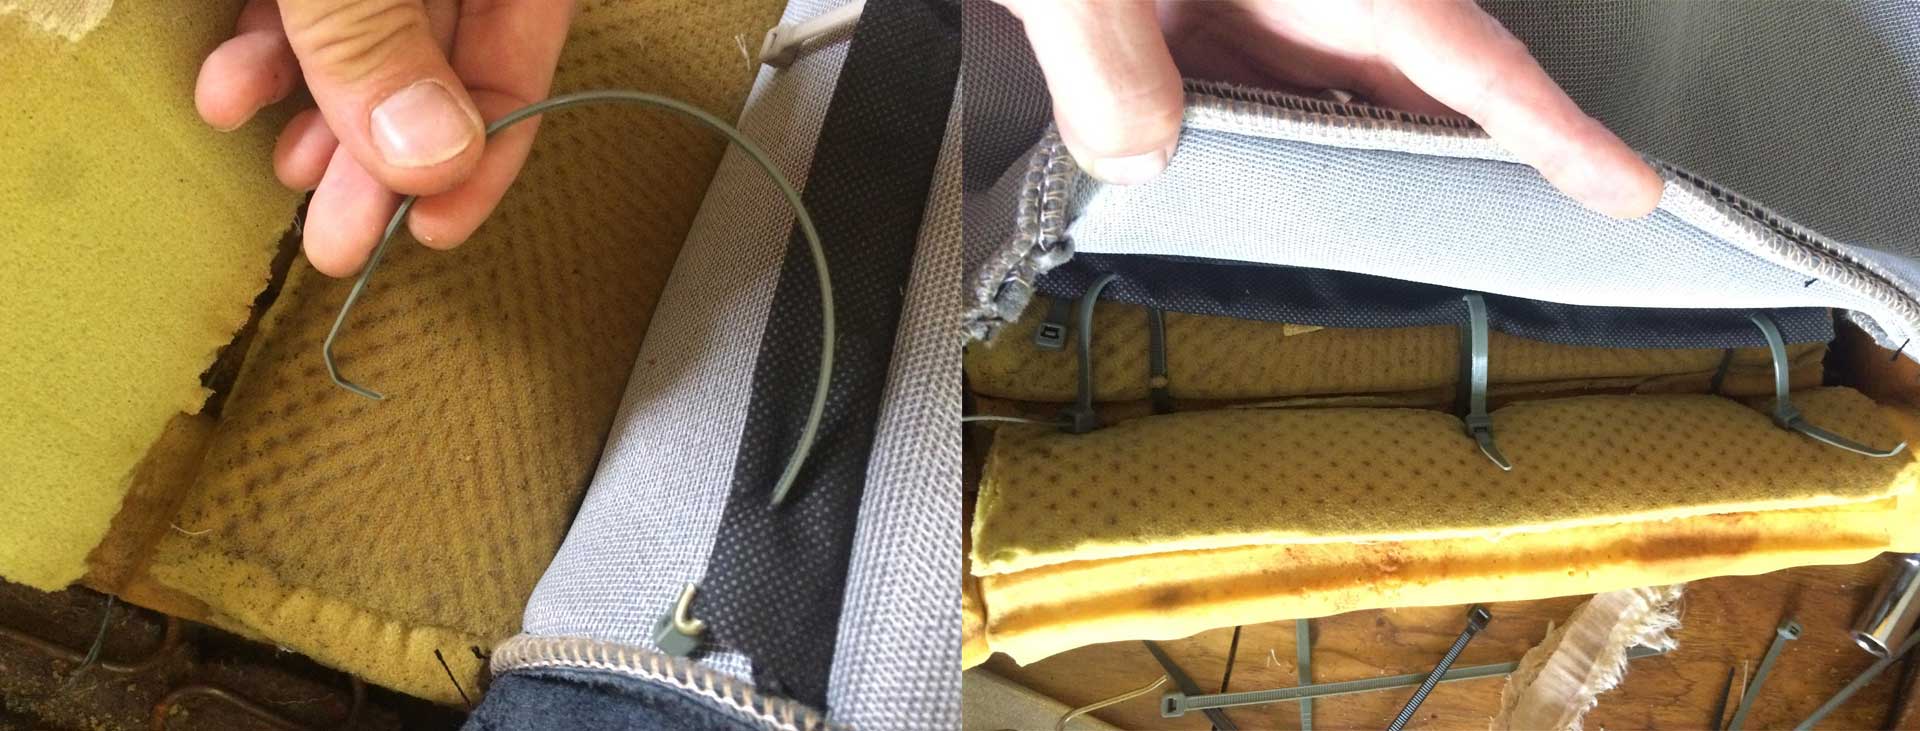
The next major amateur move required me to create retainers from coat hangers. Structurally speaking this was worth tweaking. These ribs I made sit inside fabric channels on the new covers panels. Leave them out and the zips will rip through, you’ll discover. A small screwdriver poking holes as a guide for the ties is wise.
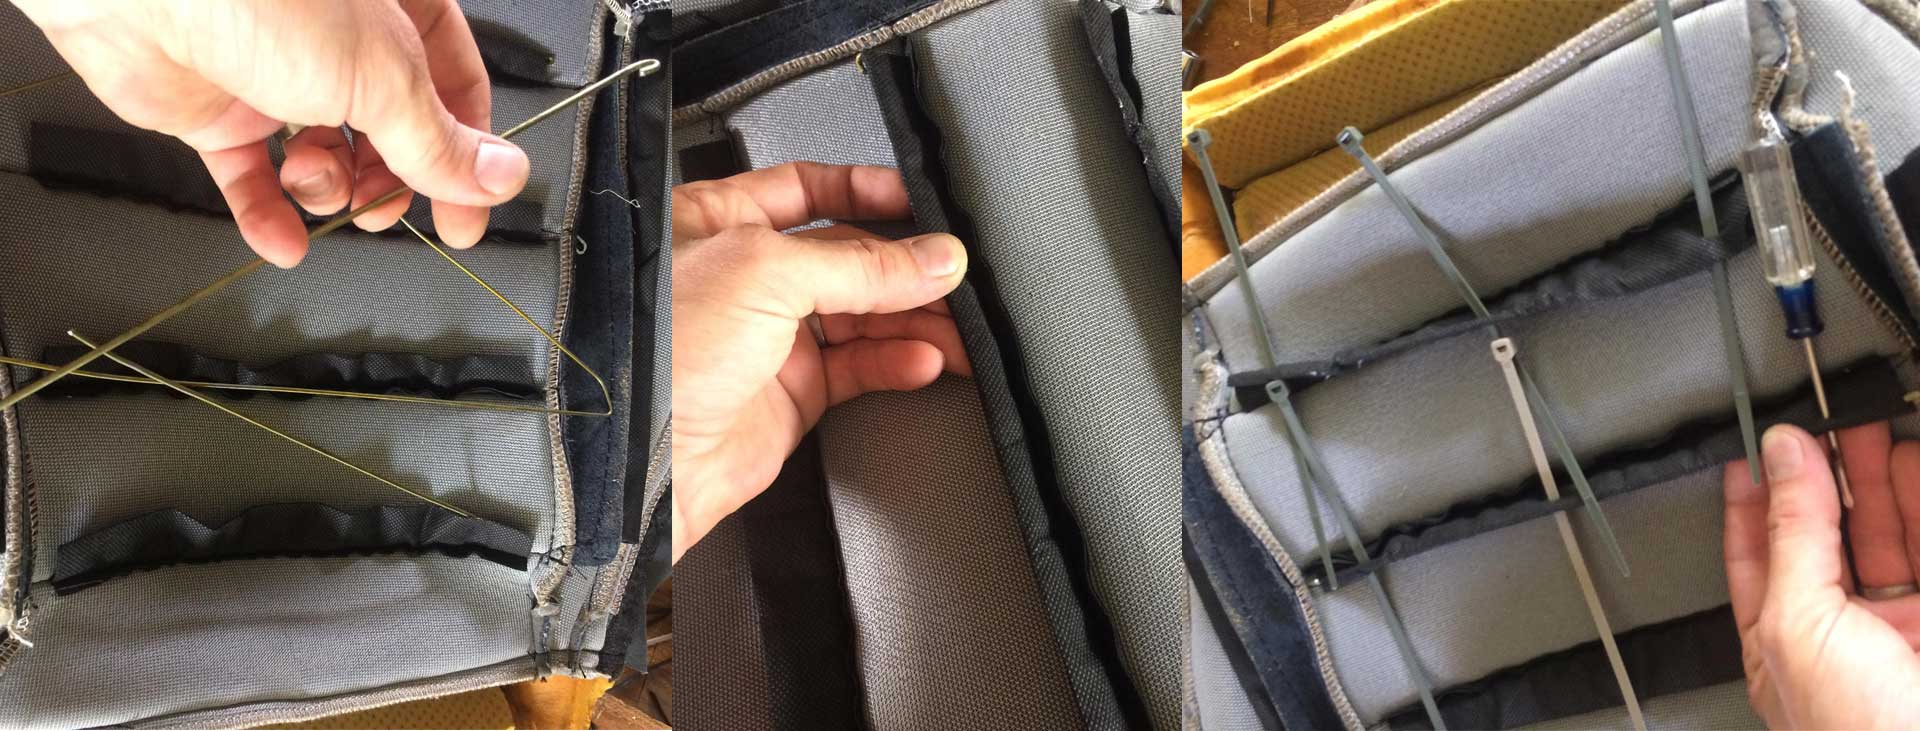
Prepare the ties section by section get them ready for tightening.Zip zip zip the ties...then clip clip clip the excess. Tightening them evenly with pliers can help them lay right and stay tight. Uneven stretching will make them look more wrinkled than fetching.
It is worth a big mention that there was much pulling and stretching. The covers are meant to be tight and to get there you may have a fight.Stay as stubborn as a goat and it’s all she wrote. One piece of web wisdom was to leave them out in sunlight. The cover softens and stretches much better when hot and can save you from cursing the covers tighter spots.
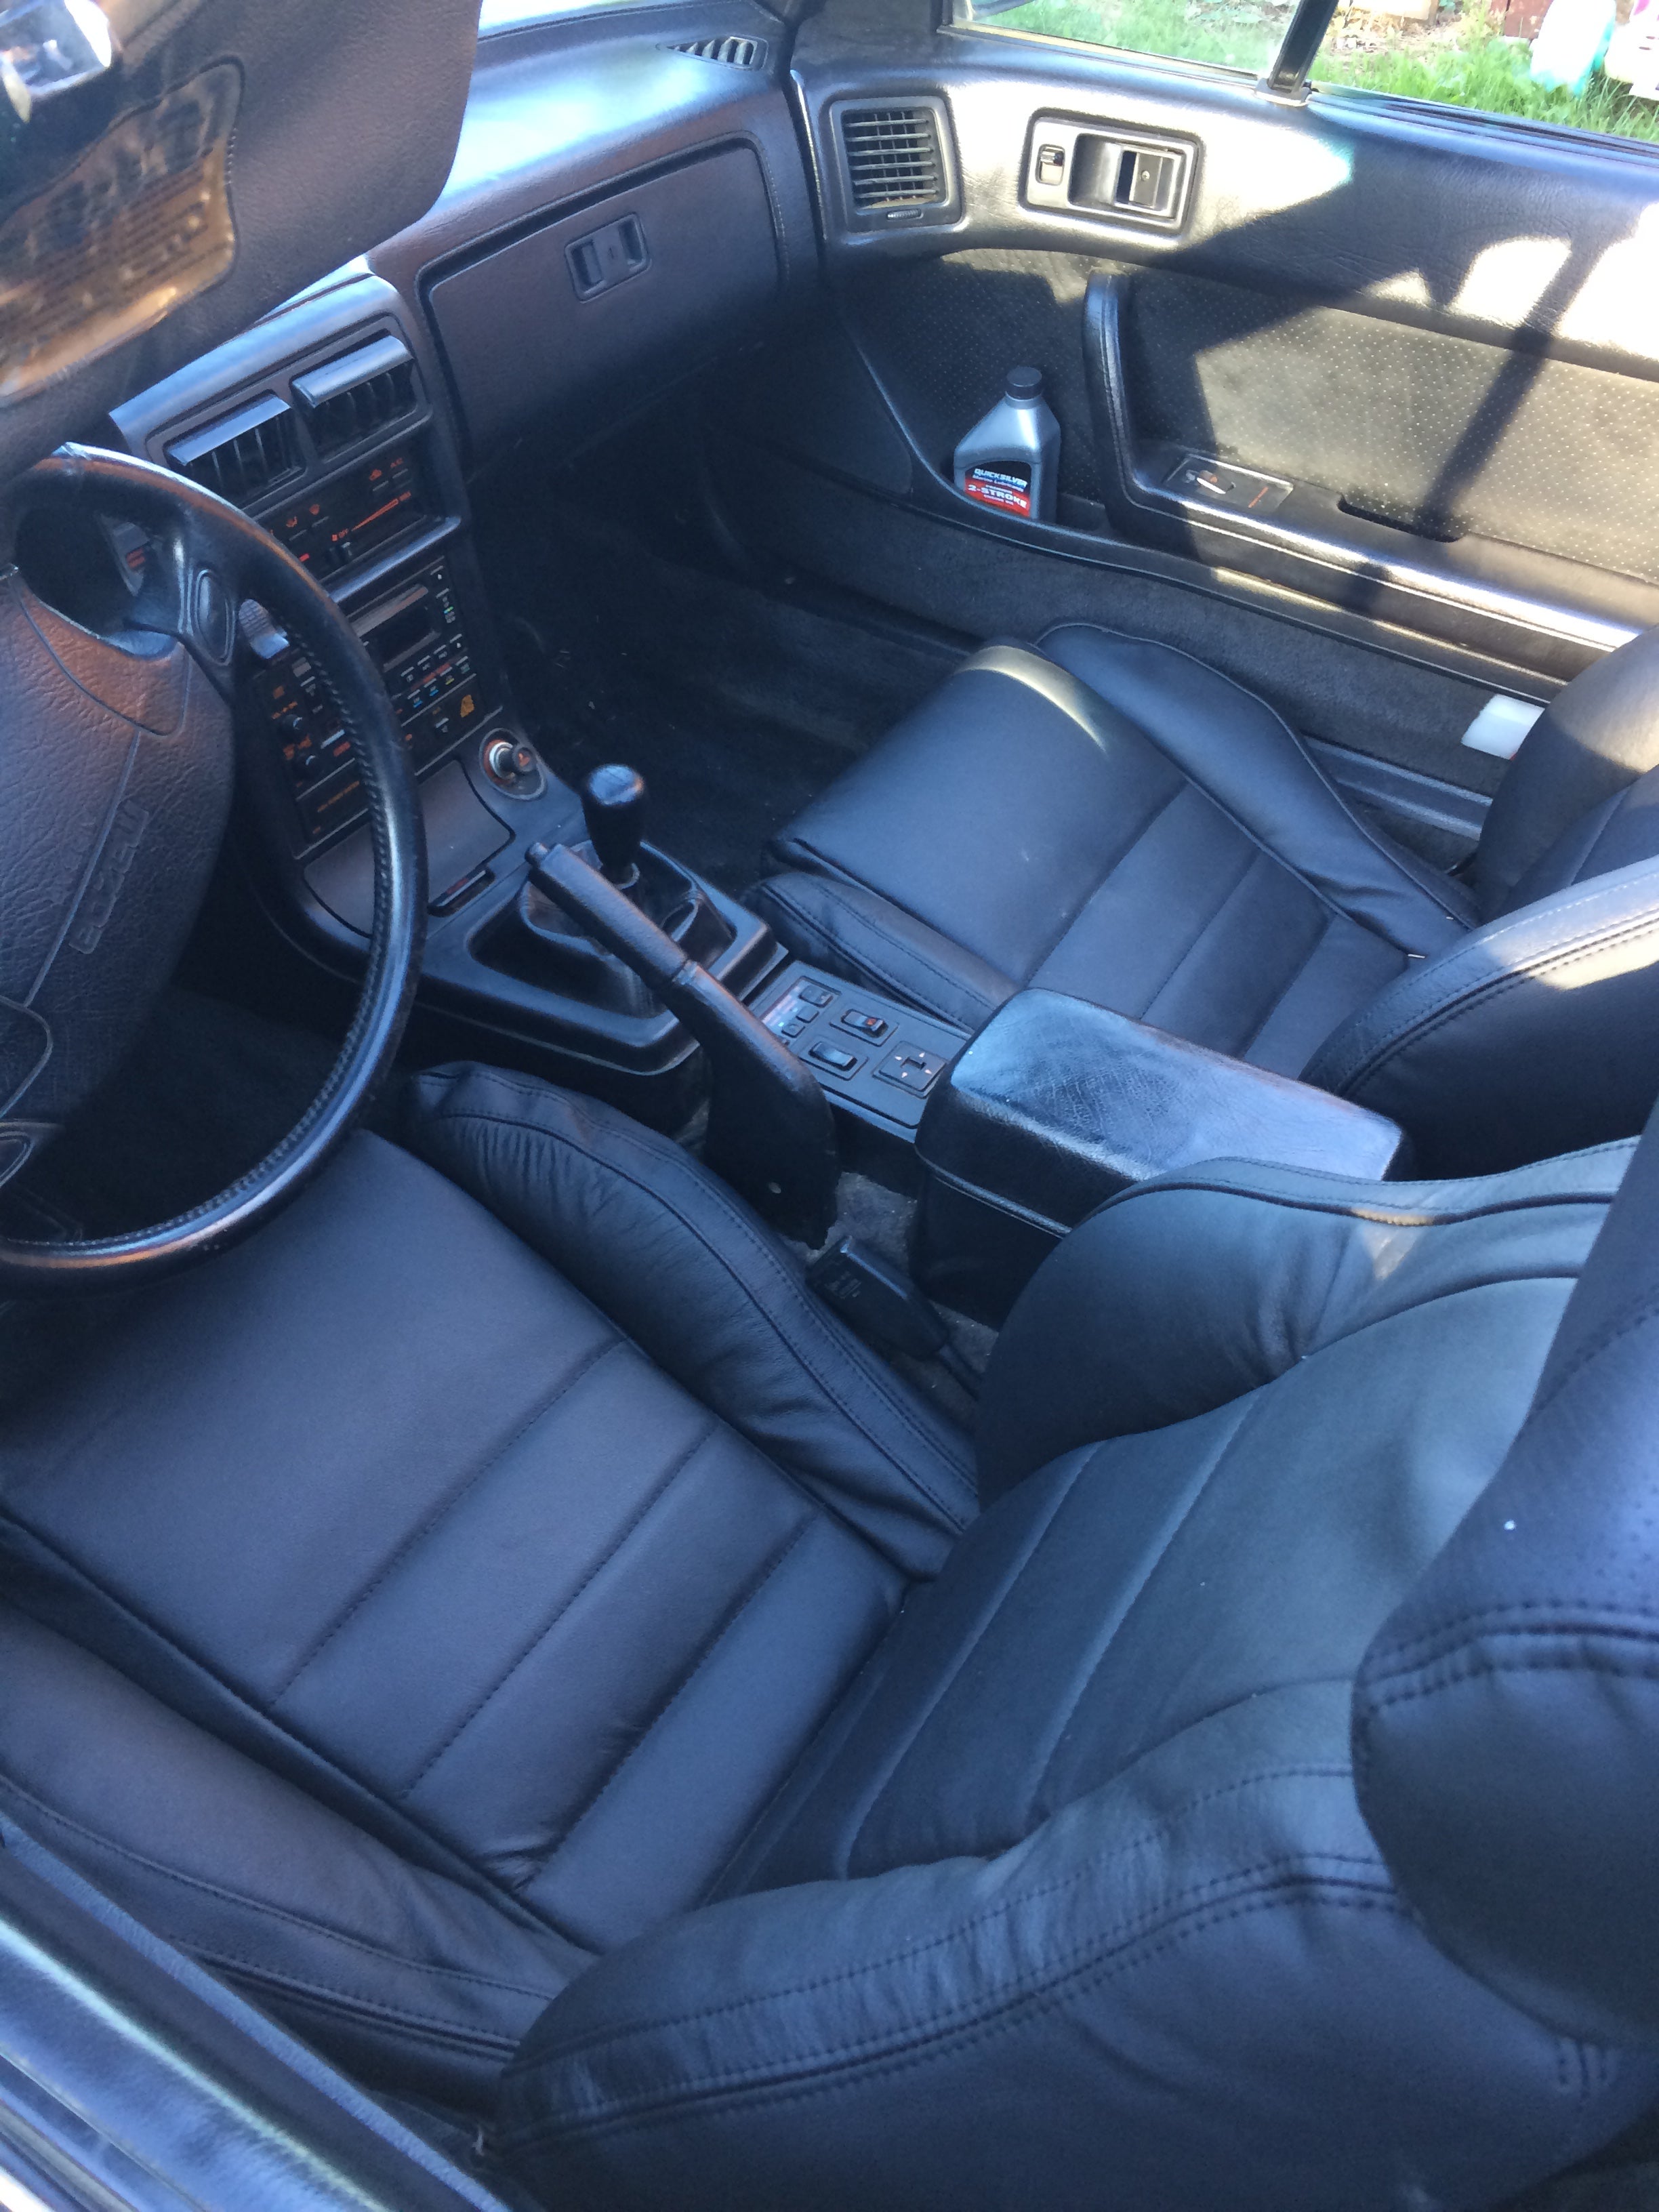
Once the battle of zipping and stuffing is won, reassemble the whole mess by reading reversed. It will go through a bit of of wear-in wherein it relaxes. Once all back intact it is one fine place to place asses.
the dollars and cents:
Seat covers: 250$ on a famous internet sales site where you bid on things.
Zip ties and hangers: 15$ from the local hardware store and my closet
Time: ~4-5 hrs per seat incl. replacing the headrest speakers
 random001
> SantaRita
random001
> SantaRita
07/28/2017 at 12:36 |
|
I’ve done this 3 or 4 times. You did good work, IMO. Last time I did this, I sliced the top of my thumb nearly clear off with the tugging and the pulling.
|
SantaRita
> random001
07/28/2017 at 12:45 |
|
Thank you for the compliment! This was one of the nicer restoration projects. You don’t end up with a greasy mess or fight too much with rusted bolts and hardware,but you still make a good 1-2 day project out of it.
Of all the things I’ve rebuilt/replaced on this car, the seats are what ends up getting noticed by most normal people like my wife.
 Jake - Has Bad Luck So You Don't Have To
> SantaRita
Jake - Has Bad Luck So You Don't Have To
> SantaRita
07/28/2017 at 12:45 |
|
Car repair tutorials that rhyme? This is a trend I can get on-board with.
|
random001
> SantaRita
07/28/2017 at 12:50 |
|
I always loved replacing the seat covers as one of the most enjoyable projects. It takes a day, is involved but not too hard, and the results are impossible to argue with. When I did the first set on a ‘Vette, it was because the foam had been cut into by the “springs” they used, really just thick wire that could do nothing but cut into the foam, and the transformation from saggy, uneven seats to firm, new leather seats was just amazing.
 Steve is equipped with Electronic Fool Injection
> SantaRita
Steve is equipped with Electronic Fool Injection
> SantaRita
07/28/2017 at 13:01 |
|
A good blast of heat will get rid of all the wrinkles on the seats too. If you use a hair dryer or heat gun be careful, because it can scorch the leather. A fabric steamer is best because the leather is still somewhat porous and can absorb a little water.
 cmill189 - sans Volvo
> SantaRita
cmill189 - sans Volvo
> SantaRita
07/28/2017 at 14:19 |
|
Looks good! I’ve pulled apart three seats and it was the opposite of fun each time.
|
SantaRita
> Steve is equipped with Electronic Fool Injection
07/28/2017 at 14:30 |
|
mine is convertible so I let the sun beat them into shape for a day or two.
|
SantaRita
> Jake - Has Bad Luck So You Don't Have To
07/28/2017 at 14:40 |
|
Its my art: the long yet educational dad joke.